


Introduction
Continuous integration (CI) and continuous delivery (CD) are essential practices that enable developers to deliver high-quality software faster and more frequently. CI is the practice of automatically building and testing code every time a developer commits a change to a source code repository. CD is the practice of automatically delivering and deploying code to various environments, such as staging, testing, and production. By using CI/CD, developers can reduce errors, improve collaboration, and accelerate feedback loops.
One of the most widely used tools for implementing CI/CD pipelines is Jenkins. Jenkins is an open-source, Java-based software that can run on any platform. Jenkins allows users to create and manage pipelines using either a graphical user interface (GUI) or a code-based approach. Jenkins also offers a large number of plugins that extend its functionality and integrate with various tools and platforms, such as Git, GitHub, Maven, Docker, Kubernetes, and AWS.
Jenkins has many features and benefits that make it a powerful and versatile tool for CI/CD. Some of these are:
Flexibility: Jenkins can handle any kind of software project, from simple to complex, and any kind of pipeline, from linear to parallel. Jenkins also allows users to customize their pipelines according to their needs and preferences.
Scalability: Jenkins can scale up or down depending on the workload and the resources available. Jenkins can distribute the pipeline tasks across multiple agents, which can run on different machines or containers.
Integration: Jenkins can work seamlessly with other tools and platforms that are commonly used in software development. Jenkins can also communicate with these tools and platforms using APIs, webhooks, and triggers.
Community: Jenkins has a large and active community of users and developers who contribute to its development and improvement. Jenkins also has rich documentation and a variety of tutorials and guides that help users learn and use Jenkins effectively.
In this article, you will learn how to create a CI/CD pipeline with Jenkins
Prerequisites
To follow along you need to have Docker installed and understand how to use it.
Installing Jenkins on Docker
There are several ways to install Jenkins on our system, but in this tutorial, we’ll be installing Jenkins on Docker.
Step 1: Open your terminal and enter the following command:
docker run -p 8080:8080 -p 50000:50000 -v jenkins_home:/var/jenkins_home jenkins/jenkins:lts-jdk11
This will launch a Jenkins server in a Docker container that uses a Linux image with JDK 11 installed. The command also enables us to access the Jenkins web interface and the Jenkins agent port from the host machine by mapping the ports 8080 and 50000. Additionally, the command preserves the Jenkins data and configuration across container restarts and updates by mounting a volume.
The output should be similar to this:

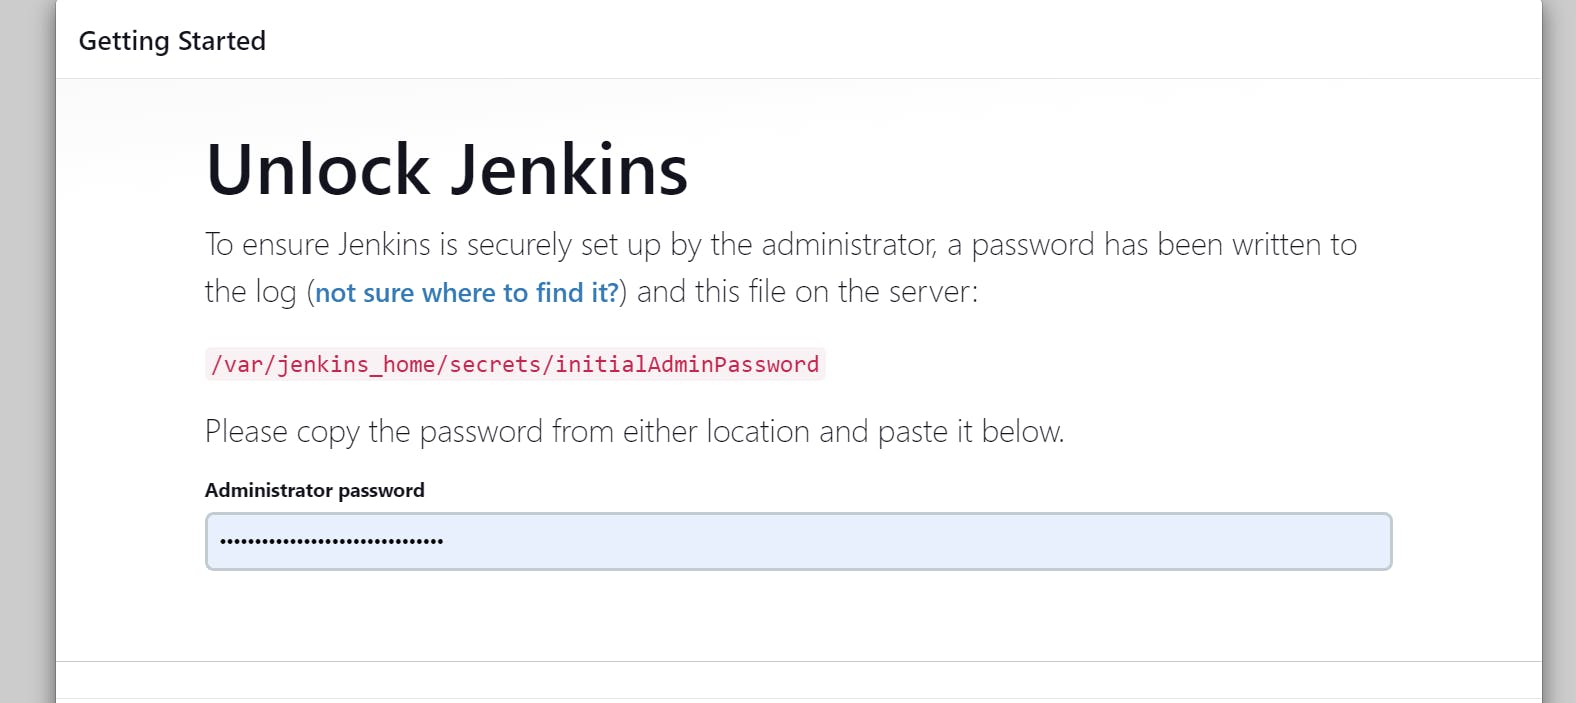
Copy the password generated in the terminal and save it.
Step 2: Open your browser and go to localhost:8080. Unlock Jenkins by pasting the password generated in the terminal as shown in the image below:
Once you proceed, you will have the option to install plugins or keep Jenkins as the basic setup.
Step 3: You will be redirected to another page to create an admin user as shown below:

Fill in your desired information. Click save and continue.
Step 4: On the next page, configure your Jenkins URL. You can leave it as the localhost or change it to your domain if you prefer. Click on "Start using Jenkins". You will see the Jenkins interface on the next page:

Creating a Jenkins pipeline
A Jenkins pipeline is a way to define and execute a series of tasks that make up a CI/CD process. A pipeline can consist of one or more stages, each containing one or more steps. A stage is a logical grouping of steps that perform a specific function, such as building, testing, or deploying. A step is a single task that executes a command, a script, or a plugin.
A Jenkins pipeline differs from a traditional Jenkins job in several ways:
A pipeline is defined using code, rather than a GUI. This makes it easier to version, review, and reuse the pipeline configuration.
A pipeline can run on multiple agents, rather than a single one. This allows for parallel and distributed execution of the pipeline tasks, which can improve the performance and reliability of the pipeline.
A pipeline can handle complex workflows, such as branching, looping, and error handling. This enables the pipeline to adapt to different scenarios and conditions, such as different environments, branches, or triggers.
To create a pipeline, we can either enter our pipeline script directly in the Script box or load it from a Jenkinsfile in our source control repository.
Creating a Jenkins pipeline directly in the script box
To demonstrate creating a Jenkins pipeline, we’ll use a sample Python script in this repository.
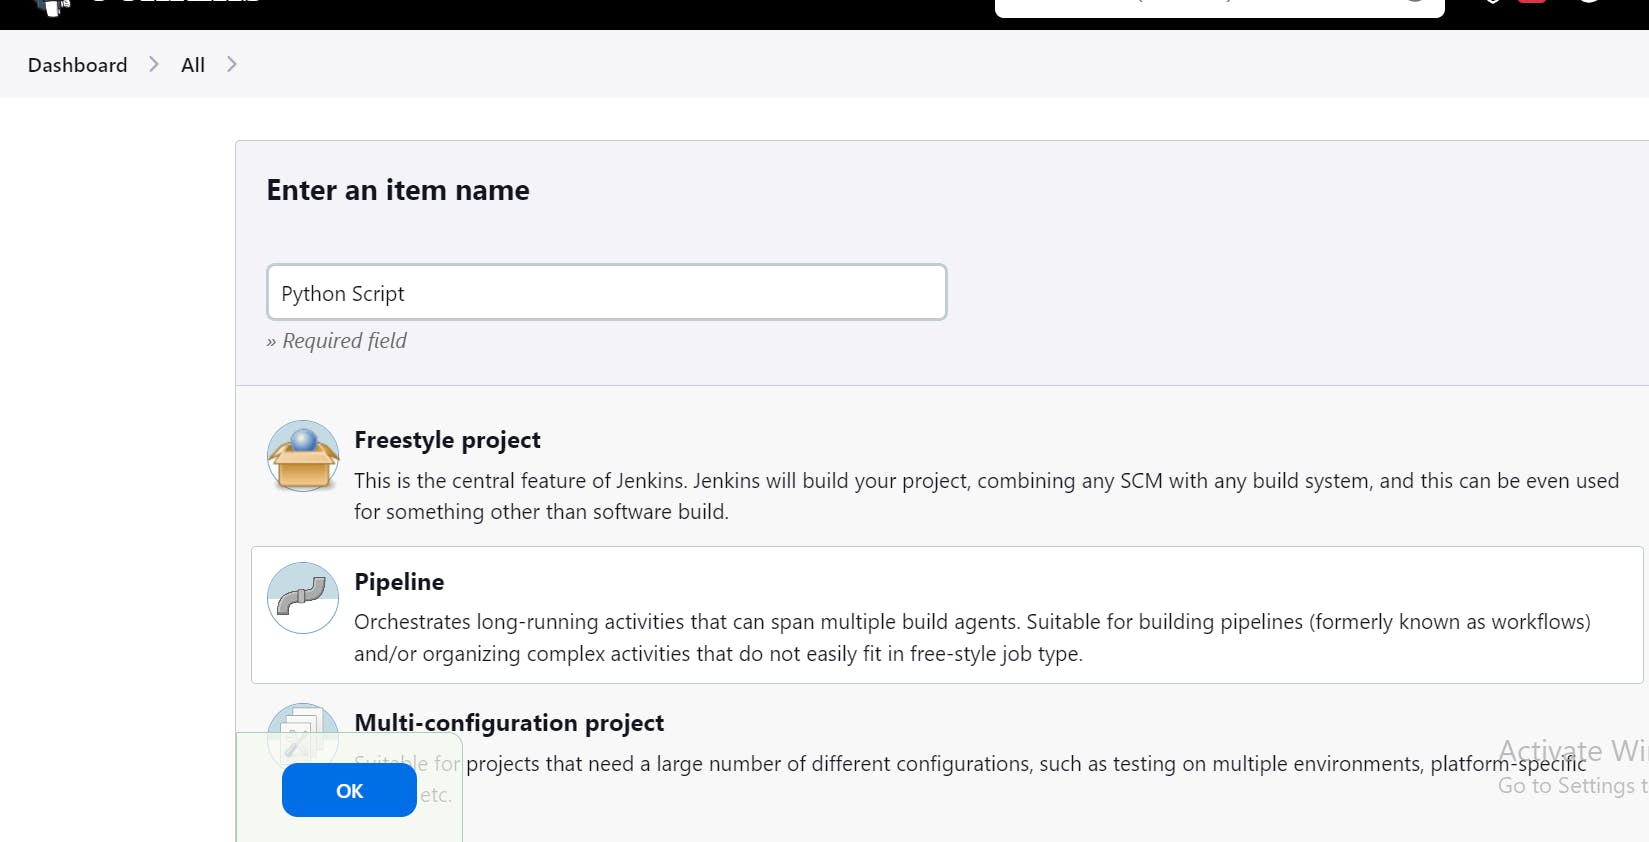
Step 1: On the Jenkins, dashboard click on “New Item”, enter an appropriate item name, select “Pipeline” and proceed. Refer to the image below:
Step 2: Once you have been redirected to the configuration page, scroll down to the Pipeline section. Here you can choose how to define your pipeline. We’ll enter the pipeline script directly in the Script box as shown in the image below:
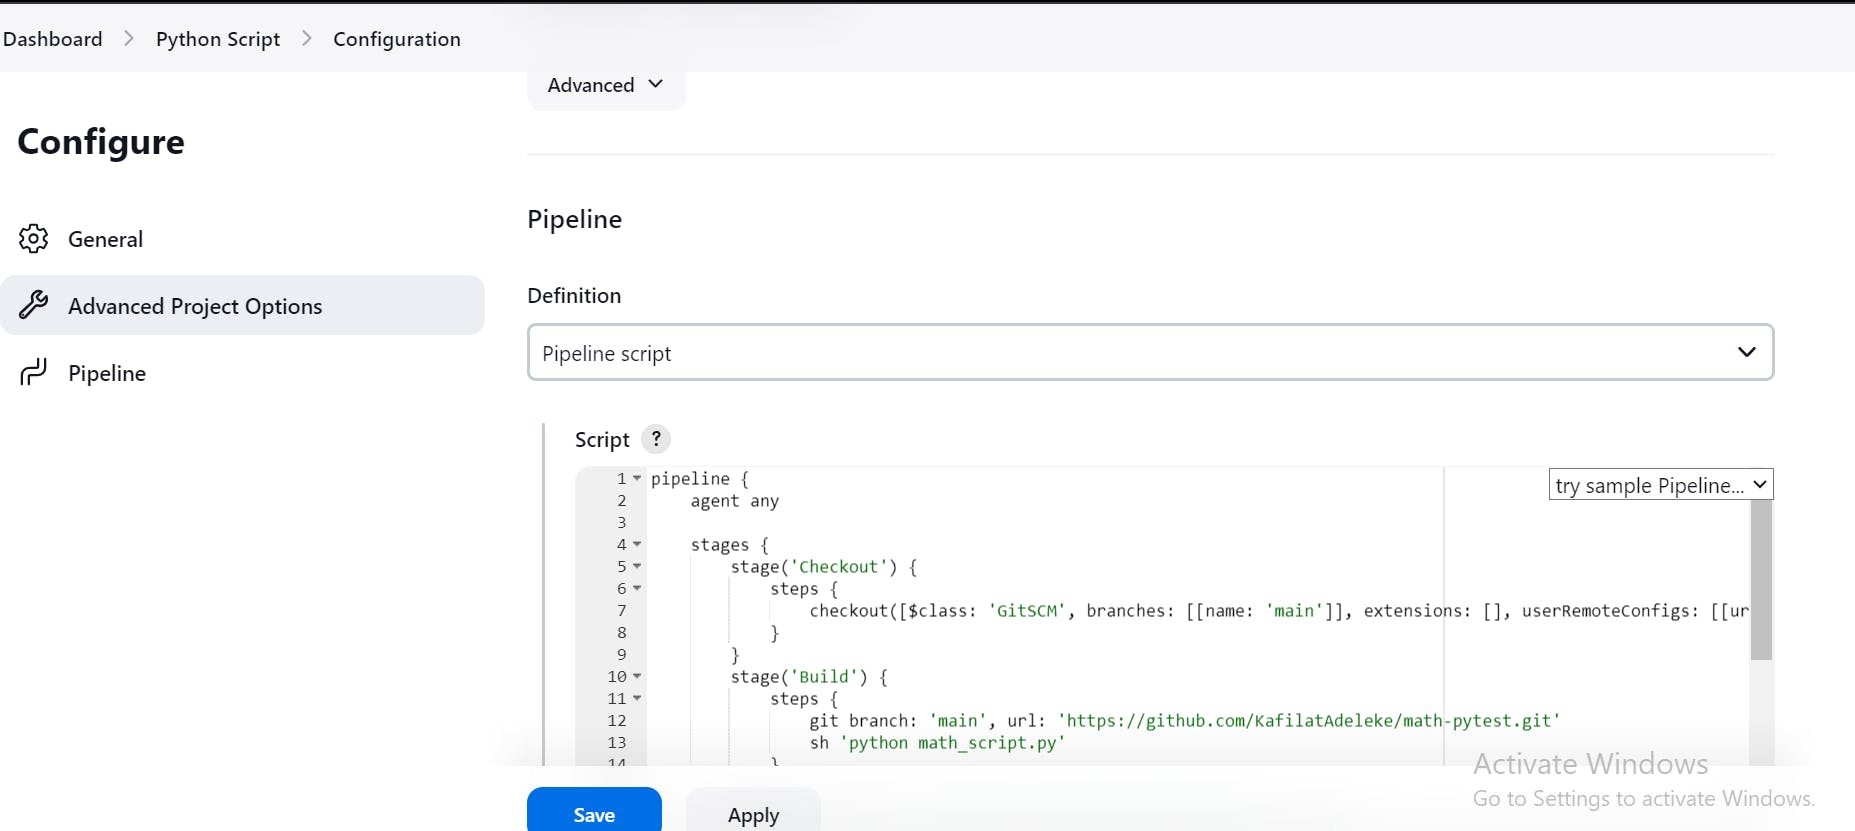
Here is an example Pipeline Script for a Python script and its unit tests:
pipeline {
    agent any

    stages {
        stage('Checkout') {
            steps {
                checkout([$class: 'GitSCM', branches: [[name: 'main']], extensions: [], userRemoteConfigs: [[url: 'https://github.com/KafilatAdeleke/math-pytest.git']]])
            }
        }
        stage('Build') {
            steps {
                git branch: 'main', url: 'https://github.com/KafilatAdeleke/math-pytest.git'
                sh 'python math_script.py'
            }
        }
        stage('Install') {
            steps {
                sh 'pip install -r requirements.txt'
            }
        }
        stage('Test') {
            steps {
                sh 'python -m pytest'
            }
        }
    }
}
Click on "Save" to proceed.
Step 3: On the next page click on "Build Now". Jenkins will start building the Pipeline.
You might get an error saying “Python3 not found” in one of the stages. This is because the Docker container where Jenkins was installed does not have Python3 installed.
To fix this error, open your terminal and run docker ps to get the container id of the Jenkins container. Then run the command:
docker exec -it -u 0 <container id> /bin/bash
This will open an interactive terminal within the Docker Container as root (user 0).
Then run the following commands:
apt-get update
apt-get install python3
apt-get install python3-pip
These will install Python3 and pip.
Click on “Build Now” again and the Pipeline build should be successful.
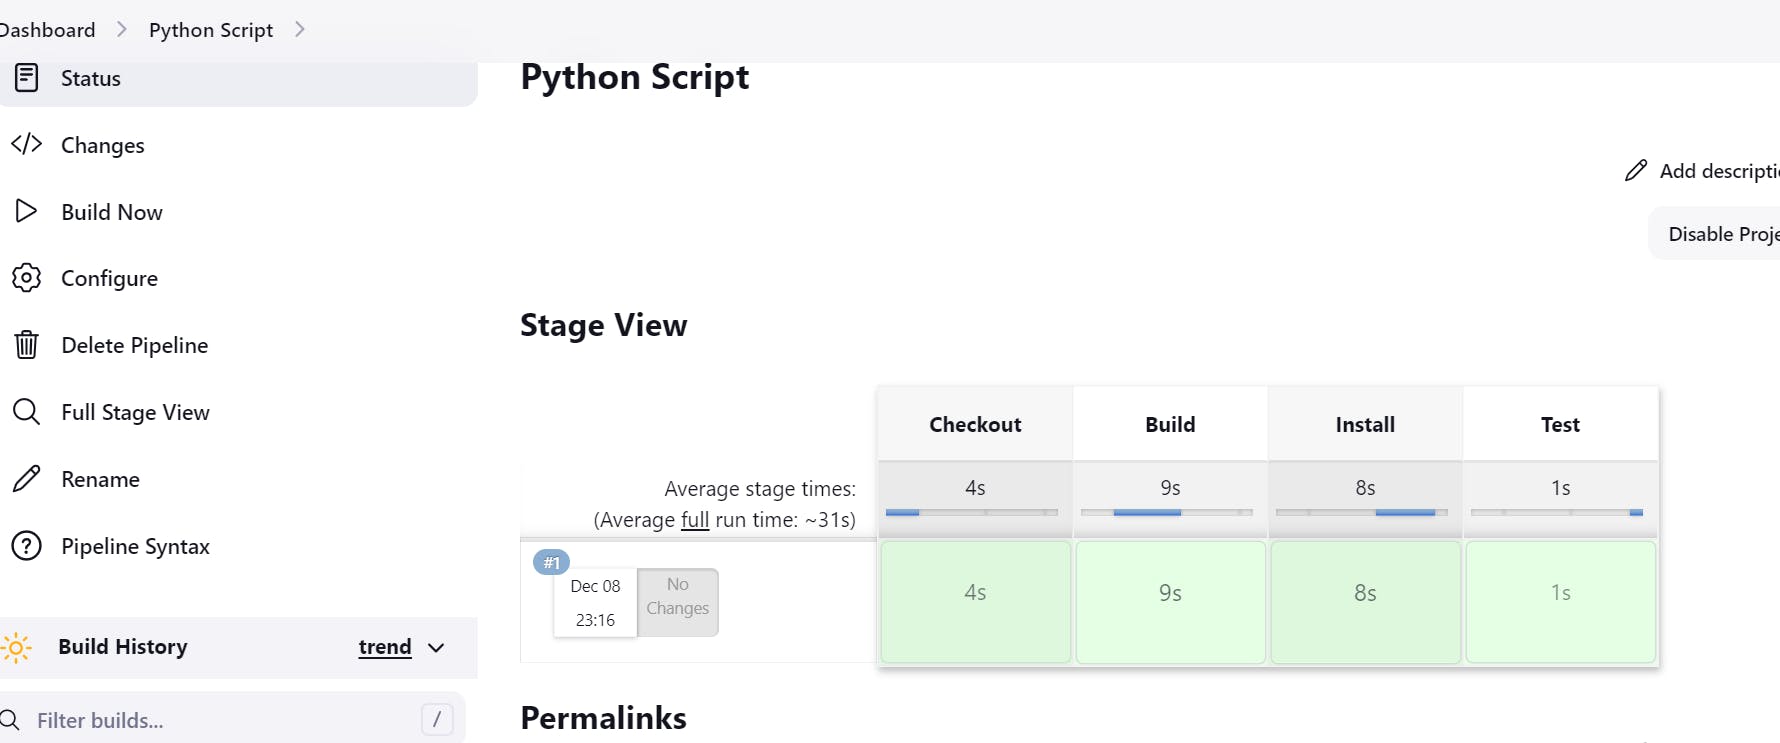
You can also view the logs of each stage.
Creating a Jenkins pipeline Using Jenkinsfile
Jenkins retrieves the source code of our application and then compiles it on its workspace. Therefore, we need to inform Jenkins of the location of our code.
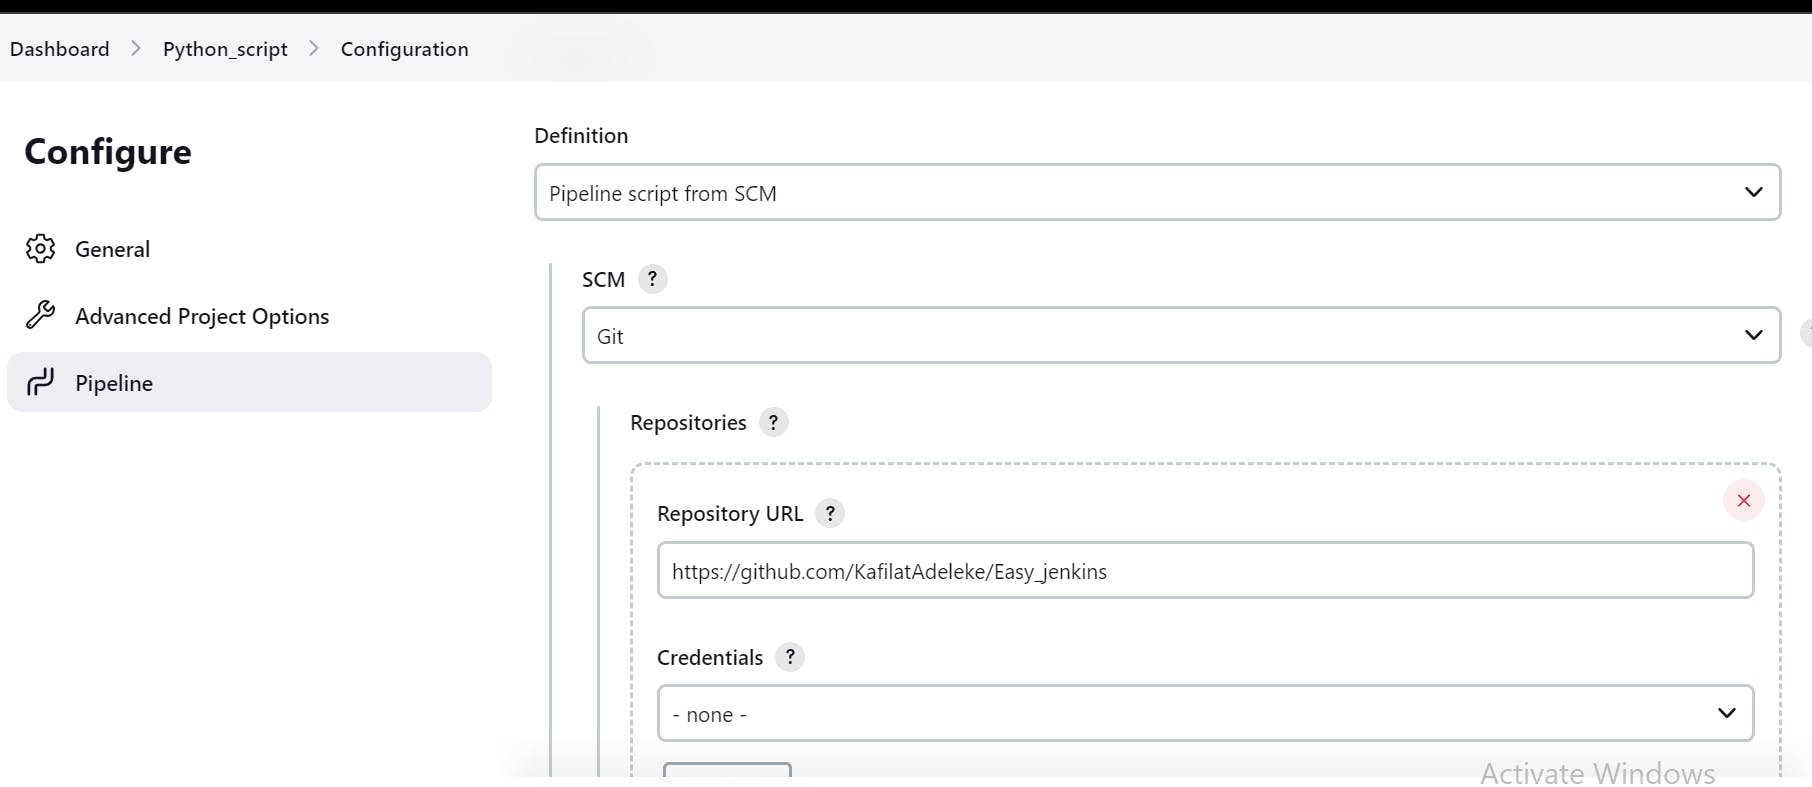
Step 1: After creating a new item and giving it an appropriate name from the step 1 above. Go to the Pipeline section and select “Pipeline script from SCM” for the Definition. Choose Git as the SCM to show the repository details. Enter your repository link in the repository field. Here is an example repository with a simple Jenkinsfile. Refer to the image below:
Click on "Save" to proceed.
Step 2: On the next page, click on "Build Now" and Jenkins will build the pipeline.
Conclusion
In this tutorial, you have learned how to create a CI/CD pipeline with Jenkins. You have installed Jenkins on a Docker container and built a pipeline job using both the Jenkins script box and a Jenkinsfile. Jenkins can make software development easier and speed up development time.